

How To Convert Drawing To Vector In Photoshop
How To Vectorize An Image In Photoshop?
In this tutorial I volition evidence you how to catechumen a JPG image to vector Photoshop shapes in just a few steps. The tutorial is a remake of the original Epitome To Vector Photoshop tutorial just to testify how information technology would piece of work on a dissimilar prototype.

At that place are a few steps y'all need to make in guild to convert an image to vector in Photoshop. Ideally you can kickoff with a cutout image (so an image without the background) or at least one that you tin easily remove the background.
First, have a expect at this video to quickly go over the steps to convert a raster paradigm to vector SVG files and then read the full step by pace Photoshop tutorial.
How To Create A Vector Prototype Effect In Photoshop
In this tutorial I am going to prove yous a simple way to create a prototype to vector effect using any photograph/image/graphics/etc. In the adjacent tutorial I am going to show you how uncomplicated information technology is to plough from photo to vector shape in Photoshop. Then let'due south start with this stock prototype of our Princess Leia; you tin employ any image you desire only if you want to create vector silhouettes the all-time are the photos with white/black background.

We tin can easily remove the image background with the Photoshop Wand Tool and get a cutout paradigm like this:

Information technology's non a perfect cutout, but for our vector effect it will do just fine.
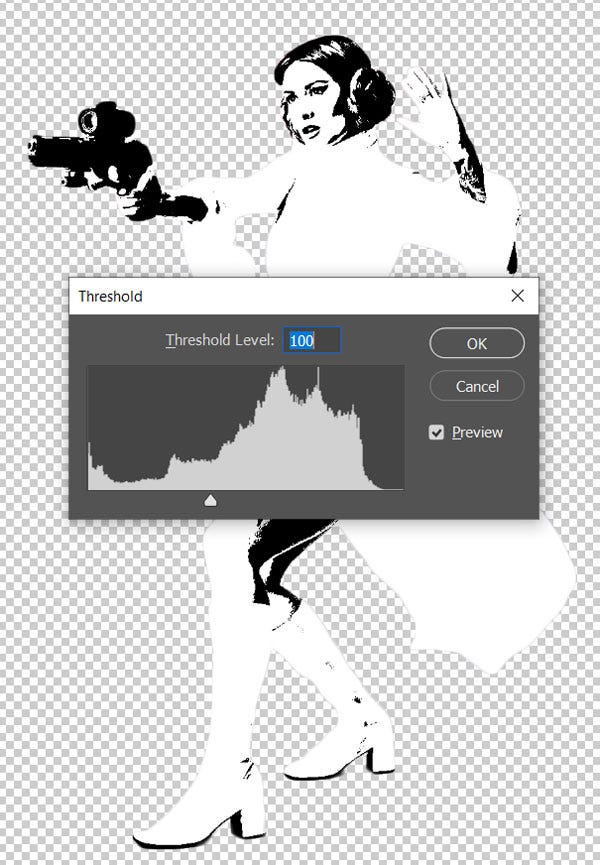
Duplicate this layer and call the layers Girl ane Layer and Girl 2 Layer. You can also proceed a re-create of the original layer. Go to Image>Adjustments and utilize the Threshold adjustment for the Daughter one Layer. Set the level depending on your photo size, details, etc.
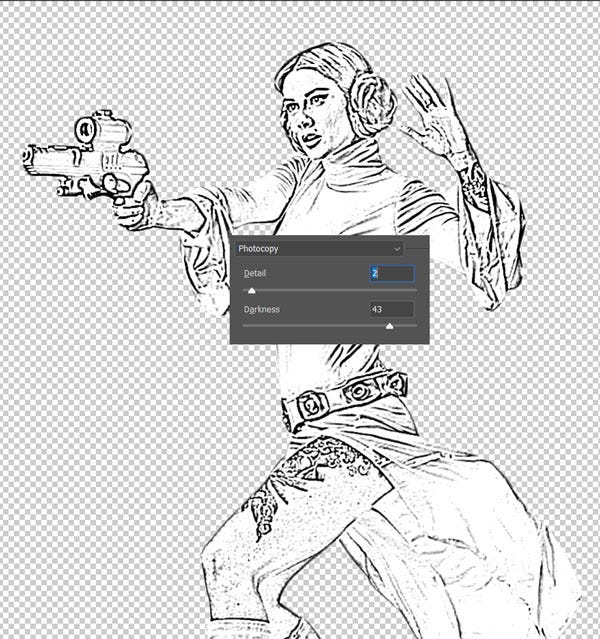
Set the foreground color blackness and the background colour white. Go to Filter>Sketch and use the Photocopy filter for the Daughter two Layer.
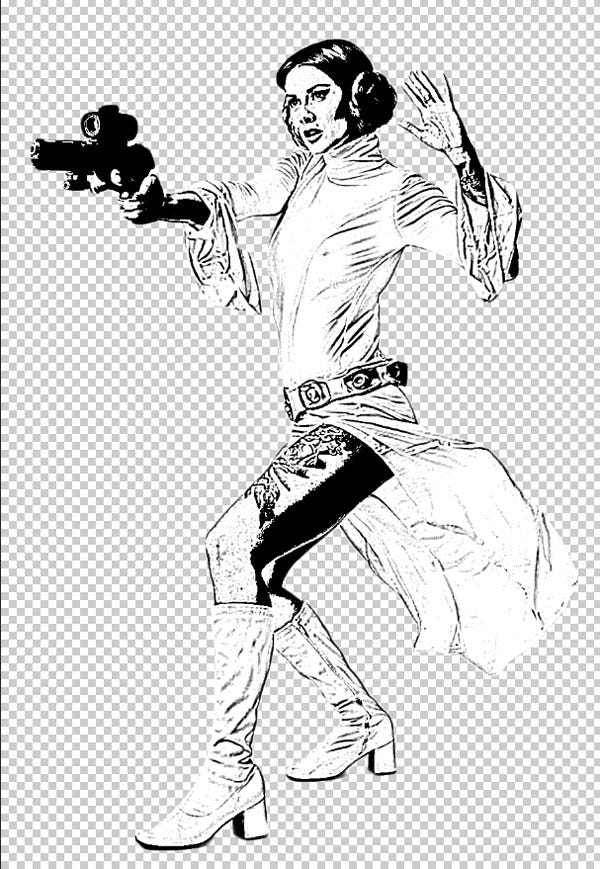
Fix the blend mode of the Girl 2 Layer to Multiply and merge the two layers.
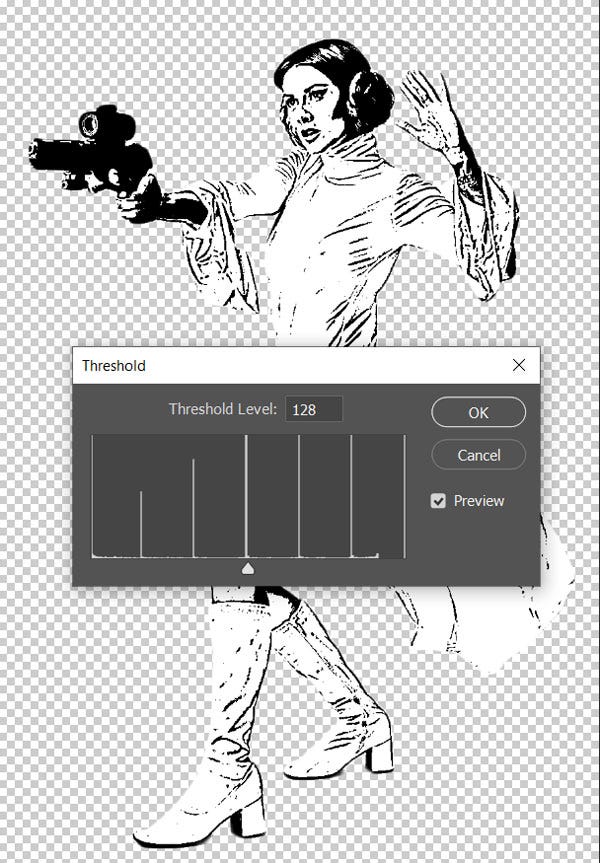
Use again the Threshold adjustment for the new created layer.
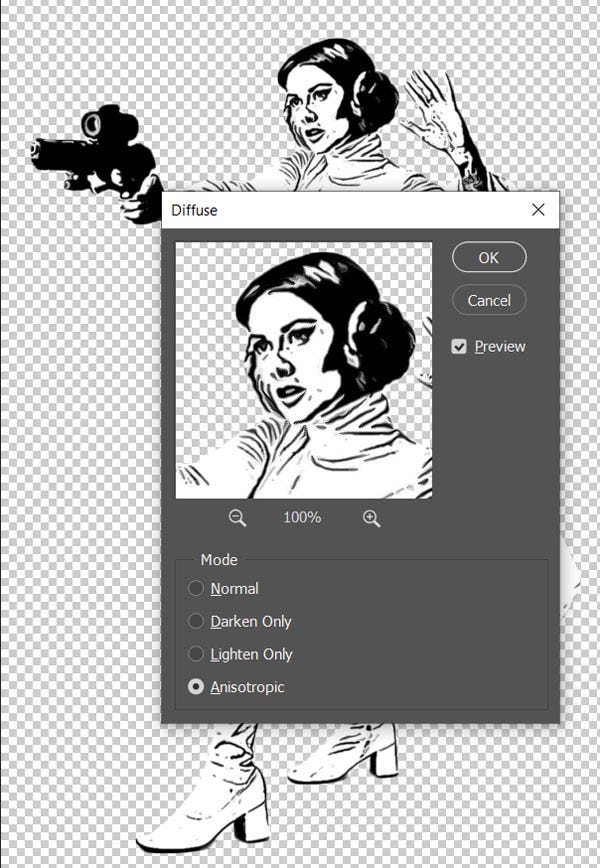
For a smoothen border result you can go to Filter>Stylize and choose Diffuse
If you want to add a few more details to the concluding image, try cartoon some blackness lines in the electric current layer. Hither'due south 1 of the best tutorials on how to draw a line in Photoshop.
Convert The Image To A Vector Shape
At present let's catechumen the paradigm to a vector shape.
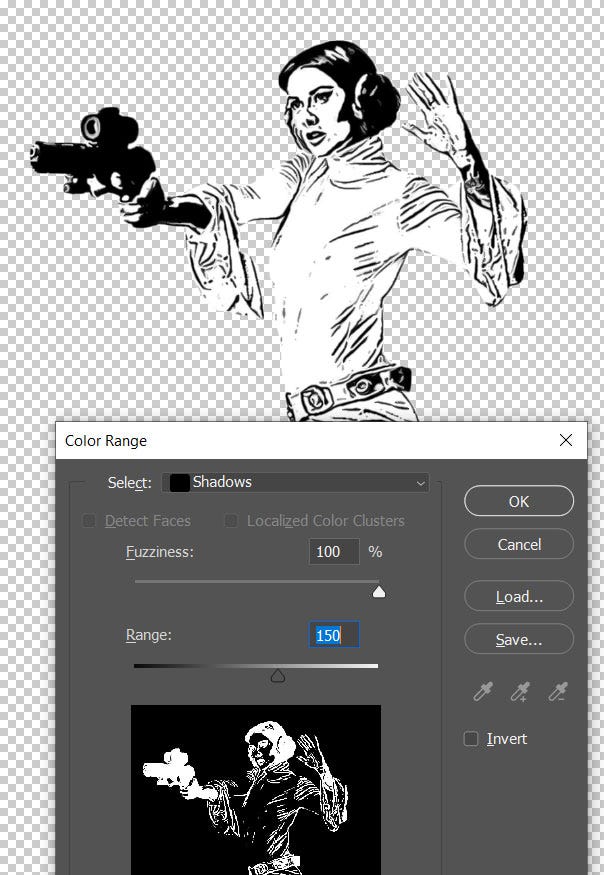
There are many methods for doing this, but I volition show you the simplest 1. Right at present we have an image that has black and white areas. Let'southward select the blackness areas by going to Select>Colour Range… and select Shadows with the following values:
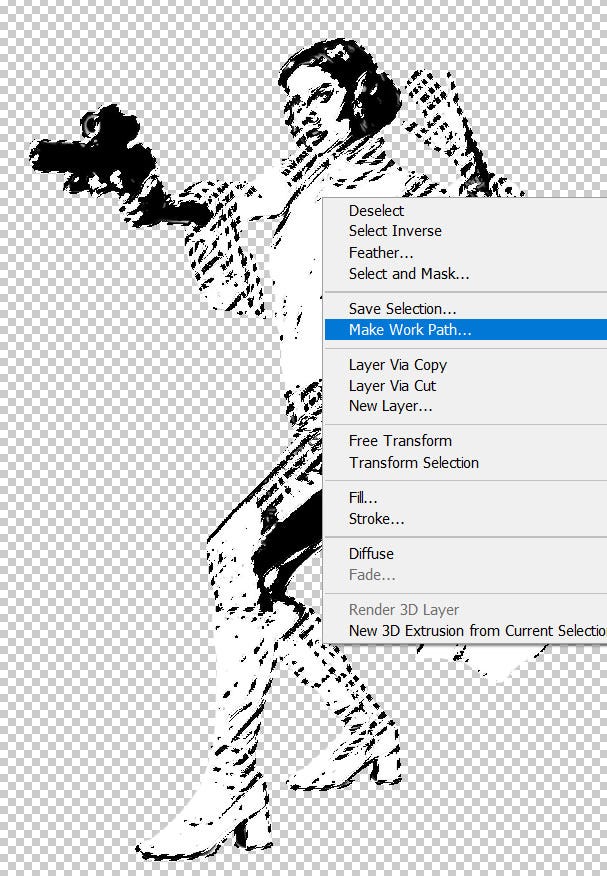
This volition create a pick of the black areas. Click on the Marquee Selection Tool correct nether the Motion Tool and so right click on the selection. Choose the Make Work Path choice, a Tolerance of 1px is OK. The higher the tolerance, the smoother the curves of the vector shape, but also the less detailed.
Nosotros tin catechumen the electric current Work Path to a vector shape by going to Layer > New Make full Layer… > Solid Colour. Choose blackness every bit the color and input a name for the new layer like Daughter Vector Shape Blackness.
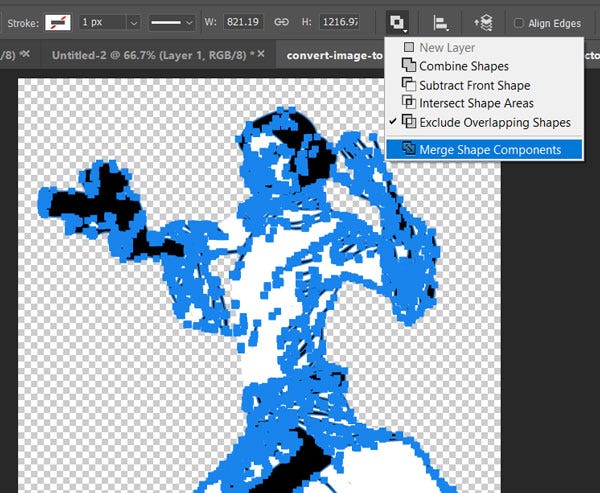
This new layer created is actually the vector shape. To make sure the vector shape is all ane single shape, go to the Shape Selection Tool (nether the Text Tool)) and select the whole shape, then merge all the parts of the vector shape.
For printing the vector shape on a T-Shirt for instance, the layer Girl Vector Shape Black is enough. But, if you want to have a complete vector image then we need to brand a similar layer for the white areas. To practise this have the exact same steps on the initial black and white layer from the Select>Color Range…, but this time choose Highlights.
Name the resulting layer Girl Vector Shape White choosing a white colour for the Solid Color fill layer.
Export SVG Vector Paradigm From Photoshop
So, we transformed our image to vector using Photoshop tools. Now what?
We can consign our Photoshop vector shapes to vector prototype formats similar SVG. To practice this, right click on the shape layer(due south) and choose Consign Equally… selecting SVG as the format for export.
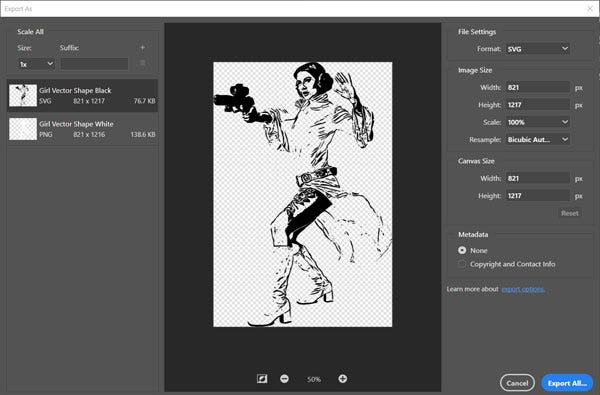
This is how yous tin catechumen prototype to vector effect. You can at present use the Paint Castor, color blackness to close the gaps and to use the Paint Bucket Tool if you lot want to add color. I have besides added a vector sunburst using these complimentary sunburst brushes to create a vector comics background. A like technique I have used in i of my oldest tutorials on how to create a comic volume effect in Photoshop.

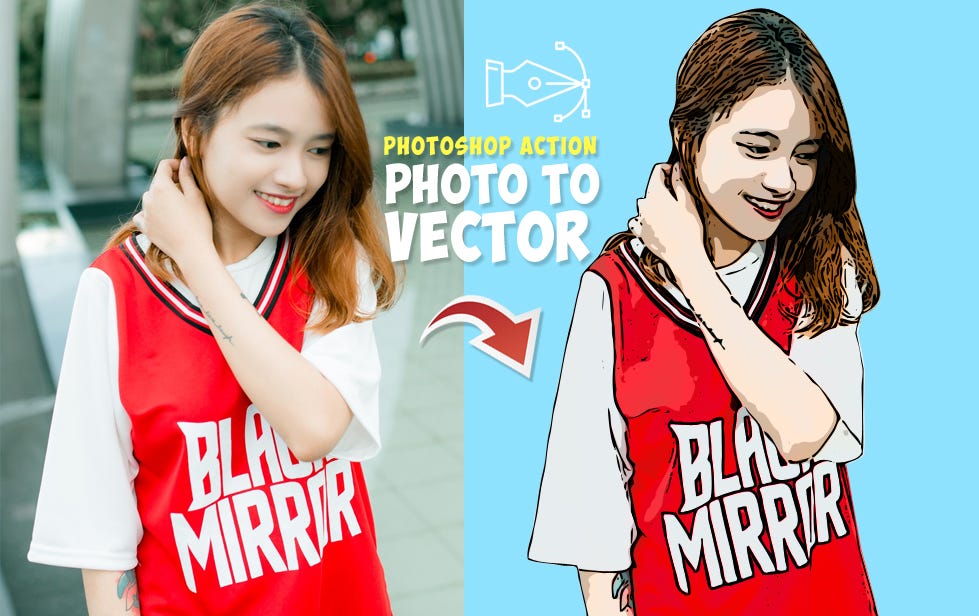
Convert JPG To Vector In Photoshop
In this related tutorial you lot volition learn how to plough the Photoshop vector effect in an bodily vector image that can be resized without loosing quality and exported to Illustrator.
Image To Vector Photoshop Action (Create Custom Shapes Easy!)
This set contains 1 layerd PSD file that will allow yous to create a vector shape silhouette out of whatever photo/graphics/paradigm. The pack also contains a Photoshop action that you can use to create custom shapes.
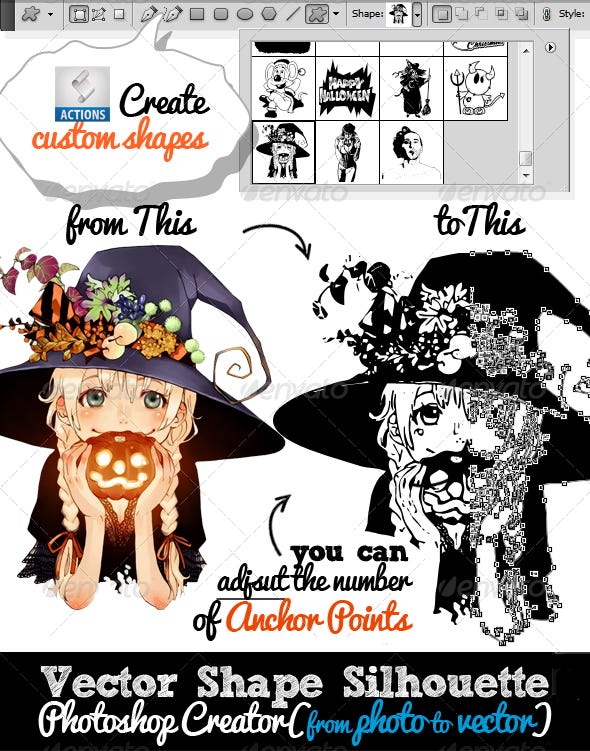
You tin can also try this Photoshop action that turns whatsoever JPG paradigm into vector using Photoshop. The results is a circuitous vector image with colors and not just a vector shape silhouette.
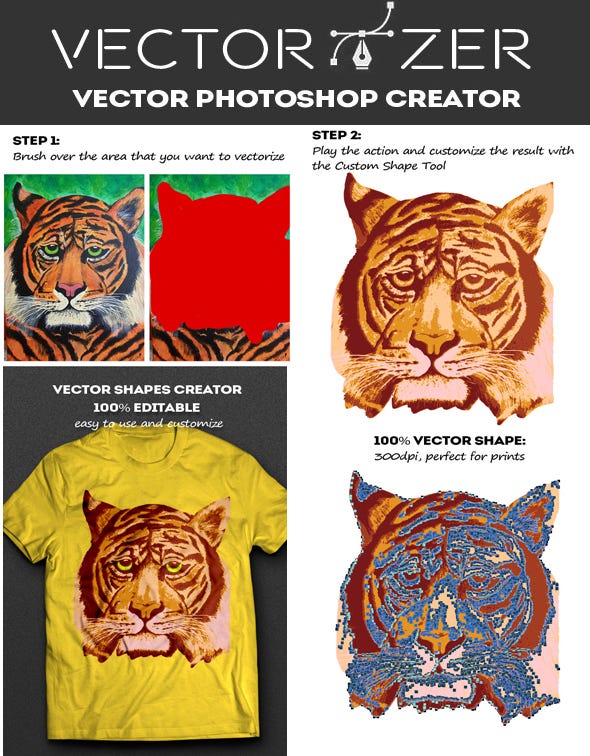
Vectorizer Convert JPG To Vector Photoshop Action (Quick And Easy!)
- unique Photoshop action to create vector art with 1-click
- create vector shapes, vector silhouettes, vector images, vector art from any image
- 300 dpi great for print (T-shirts, coffee cups, magazines, books, flyers, etc)
- Tested and working with Photoshop CS and CC, all linguistic communication versions
- Requirements: RGB color, 8 bit, 72–300 DPI
- Easy to Edit and Customize
- Fully customizable
- Piddling Photoshop Skills Required

Source: https://medium.com/@codingdudecom/vectorize-image-photoshop-69e349d78721
Posted by: hammerstherong1944.blogspot.com
0 Response to "How To Convert Drawing To Vector In Photoshop"
Post a Comment